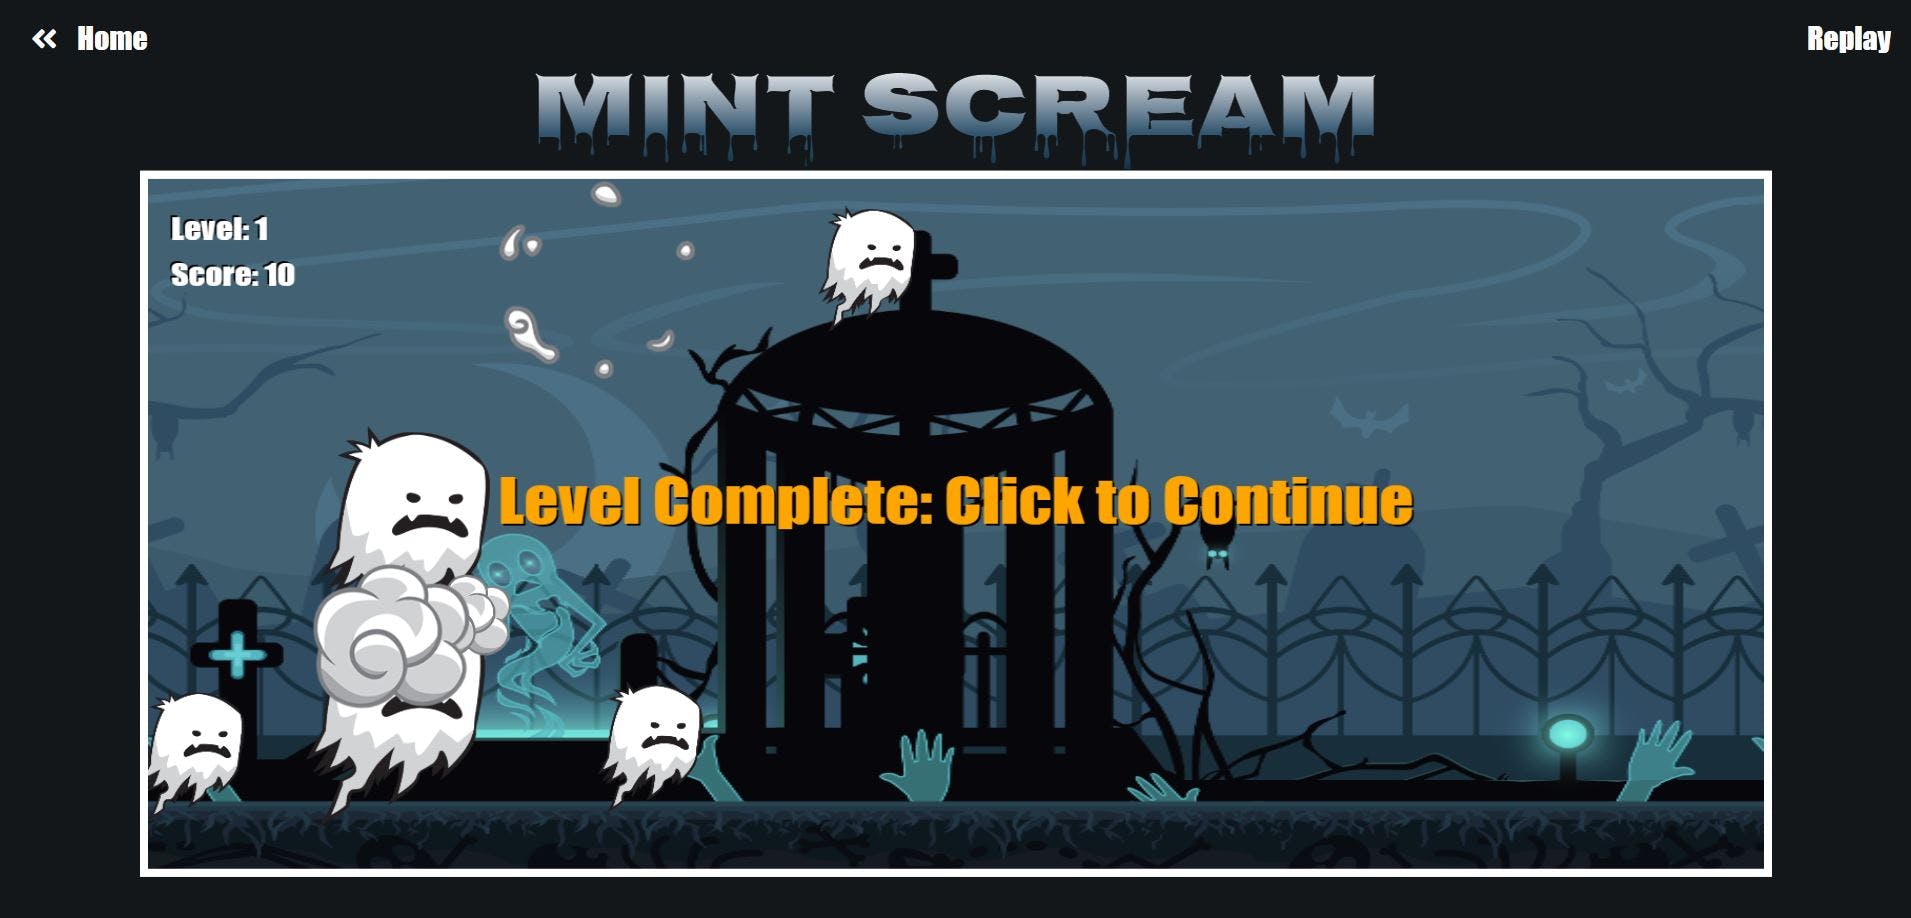
Can hackathons become addicting??? Asking for a friend...
A few weeks ago I joined my first hackathon and while I missed out on sleep, I enjoyed the thrill of trying to create a fully functioning app within 7 days. From the brainstorming of ideas in the beginning, to the struggle of writing functions in the middle, and to the prioritizing at the end, every moment was exhilarating. Clearly already addicted to this rush, I decided to enter my second hackathon.
Hackathon Details:
Company: Mint Bean
Who: Myself and one other fellow dev
Duration: 1 week
What: Create a 2D game
Growing up playing Artie and Nintendo I am no stranger to 2D games...but building one...now that was going to be a challenge. In this blog, I will talk about the good, the bad, and the downright ugly of my second experience.
The Good:
Let's start off with the positive. For starters, I teamed up with an amazing fellow dev who was very passionate about getting it right. This made working together easy since we both shared a common goal and drive.
We were able to successfully build a 2D game from scratch using only HTML5 Canvas, CSS, Bootstrap, and plain ol' vanilla JavaScript! While there are so many gaming libraries we choose not to use one. Instead, we decided to use Canvas which is an HTML element that allows the developer to draw graphics on the "canvas" via JavaScript. This application allowed us to integrate customized sprites and parallax scrolling backgrounds which brought our animation to life.
From start to finish this entire project was an eye-opening learning experience that gave me an appreciation for the games of my past.
The Bad:
Trying to build a 2D game without the use of gaming libraries is like a professional boxer intentionally tying one hand behind their back during a fight. Trust me when I say, we weren't trying to "flex" in the ring, we just didn't know any better. Not surprisingly, this brought up a lot of challenges.
Prior to this project, I had zero experience with HTML Canvas or manipulating data on the x and y-axis. As a result, so many issues came up that I ended up changing my home address to StackOverflow. The biggest challenge was trying to create a click event that navigated the user from one level to the next. For two days straight, I googled my heart out trying to get a click event to not only render but also navigate to a sister page. I could get the click to render OR I could call a function that included a location.href but I couldn't get them both to work together. It was only after fully describing my code out loud to a fellow dev that I realized I had a cascading issue with my 3 canvases. The third canvas was causing my click to stall out but once I rearranged the order, I was back in business. Sometimes half the battle is knowing what keywords to google.
Below is the code snip that rendered my click event and brought it to life.
function drawNextLevel(){
    const box = {
        x: 250,
        y: 150,
        w: 1000,
        h: 400
      }

    ctx.beginPath();
    ctx.font = '4rem Impact';
    ctx.textAlign = 'center'

    ctx.fillStyle ="black"
    ctx.fillText('Level Complete: Click to Continue', canvas.width/2 + 2 ,
                       canvas.height/2 + 2 )
    ctx.fillStyle ="orange"
    ctx.fillText('Level Complete: Click to Continue', canvas.width/2 ,
                       canvas.height/2 )

    canvas.addEventListener('click', function(ev) {
    const {x, y} = getCursorPosition(canvas, ev);

    if(box.x <= x && x <= box.x + box.w && box.y <= y && y <= box.y + box.h) {
        location.href = '../Level4/goblin.html'
    }

    });

    function getCursorPosition(canvasBox, event) {
        const rect = canvasBox.getBoundingClientRect()
        const x = event.clientX - rect.left
        const y = event.clientY - rect.top
        return {x, y};
    }
}
To get the click event to work, I first had to create an object that included a height, width, and location on the x and y-axis. By not assigning a color property, my click "box' was invisible. I then drew some words on the page with ctx.fillStyle and ctx.fillText and made sure they were rendered inside my box object. Lastly, I created an event listener that was triggered when a click was made inside my box object. Now when the user clicked on the words, the click event function would trigger and voila, Level 2 here we come!

The Ugly:
With both fists up in the air, I say....THE CODE!
With only 7 days to complete a project, we were completely unfamiliar with, we had to focus on creating a minimum viable product and as a result, there was nothing dry about our code. In fact, it was more like a flash flood!
Our game included four levels but we built each level as if it was independent of the others, this resulted in repetitious functions. If we had more time, the code would be refactored to run more smoothly by importing and exporting the needed code.
Links:
Try out our app here
Review the code here